Installing or upgrading a kitchen island in your kitchen is a smart move. One house-selling expert says that the kitchens which impress buyers the most are the ones that have an eye-catching kitchen island. Other designers and real estate agents call a kitchen island a “must have”.
Islands look beautiful, save space, and offer extra storage and functionality – not to mention creating the overall impression of a more luxury-grade kitchen. Even if you’re not planning to sell right now, it’s never a bad idea to make your home more attractive while increasing its long-term value.
Since a kitchen island isn’t usually a super expensive item (compared to your average remodeling project), it’s also often a safe bet for a high return on investment (ROI). This is even more true if you factor in things like aesthetic value and enjoyment factor – although those things are hard to estimate, since they will differ from person to person.
In general, though, most small to mid-size kitchen remodeling projects (like adding an island) recoup an average of 78% of their cost when the home is eventually sold. That’s a lot higher than most other remodeling projects!
Below are 18 incredible kitchen island ideas to get you started, along with each island’s pros and cons, as well as their estimated costs.
- Repurposed Console Kitchen Island
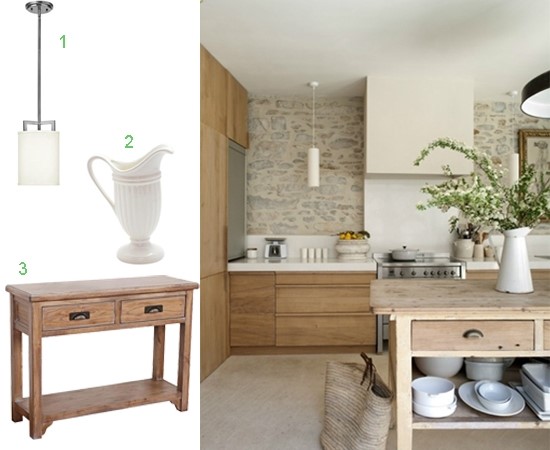
If you have an old console table you’re not using, why not turn that into your next kitchen island? Console tables are designed for use in halls and entryways to provide aesthetic value and (often) extra storage. But there is nothing stopping you from repurposing a piece of furniture already meant to beautify a space and using it to improve your kitchen setup.
Pros: Consoles are usually very narrow, meaning they won’t take up too much precious space. Many of them come with drawers or shelves built-in, giving you much needed storage areas.
Cons: If the console you’re using doesn’t have a lot of storage options, you may have to get creative or add a lot of hardware to get the space you want. Also, if you don’t have one and can’t find one you like that matches your kitchen, you might have to buy new – but that sort of defeats the point of the “repurposed” look.
Cost: If you already have one, it could be free! You can also get them from anywhere from $10 to $200 on Craigslist or at garage or estate sales. If you plan on painting or adding hardware (such as caster wheels – a cheap, smart bet in a kitchen), you’ll have to factor in those costs as well.
- Workbench Kitchen Island
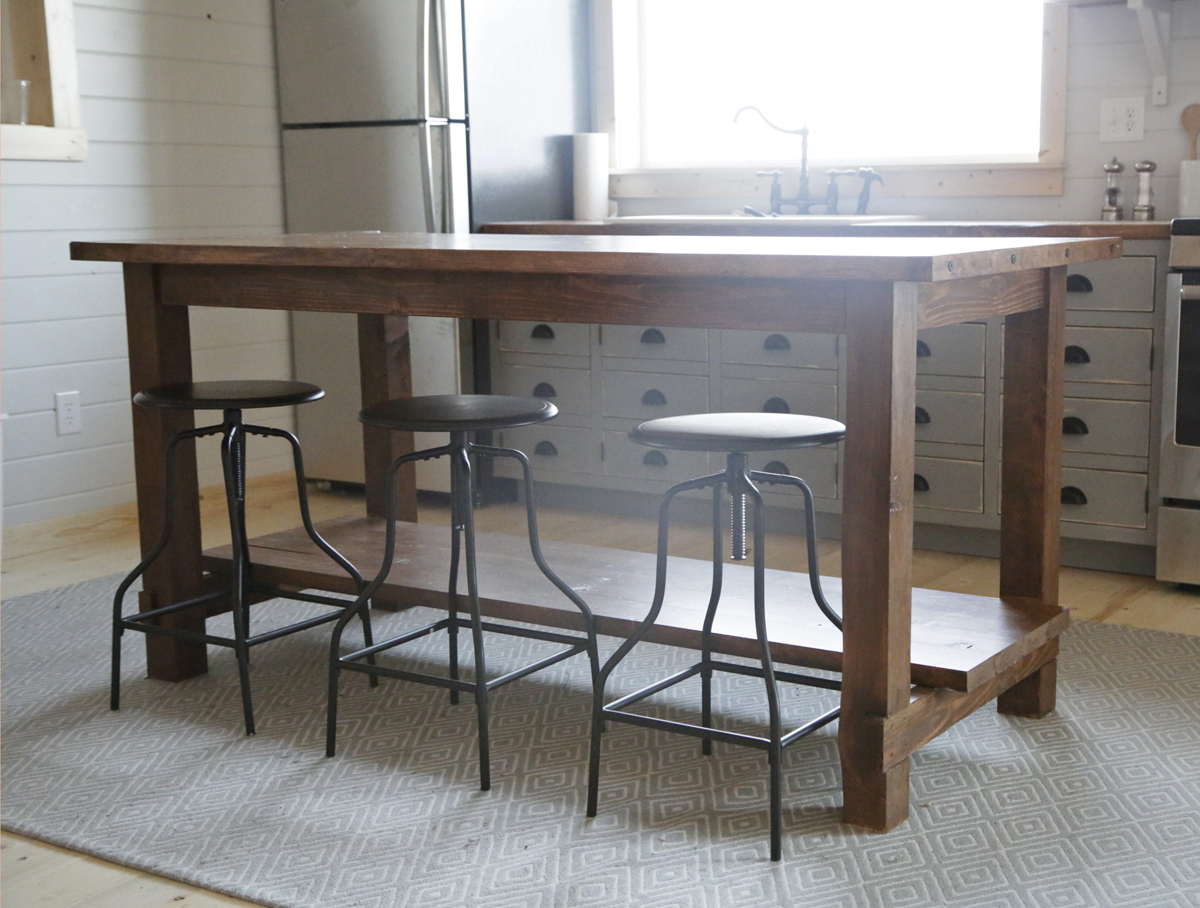
You know that workbench in the garage that no one ever uses? The one that’s taking up space, but you don’t want to get rid of it because you might use it someday? Well, guess what – you are going to use it someday. As your kitchen island! A workbench is typically exactly the right size and shape for an island and often has perfectly sized drawers. And many of them are already on wheels, which is great for portability.
Pros: If you go with a metal workbench, like this Husky tool bench, you’ll love the extremely wide top drawer for storing spices, cutlery, and other things taking up counter space in your kitchen. But regardless of what kind you choose, workbenches are designed to hold tools and take a beating – exactly what you want if you’re planning on using the island for cooking.
Cons: If you refurbish an old bench, you’ll most likely have to factor in the costs of resurfacing: sanding the top surface and possibly oiling and staining it – though those things don’t typically add up to much (You don’t want to cook on a surface that has old oil or paint spills on it!).
Also, workbenches work best in a kitchen that already has a rustic or industrial look – so this island solution won’t look great just anywhere.
Cost: That depends on what’s in your garage. An old one may just cost you $25 for some sandpaper and some nice hooks for hanging things or other embellishments. A brand new one will typically run you between $250 and $450.
- Metal Rack Kitchen Island
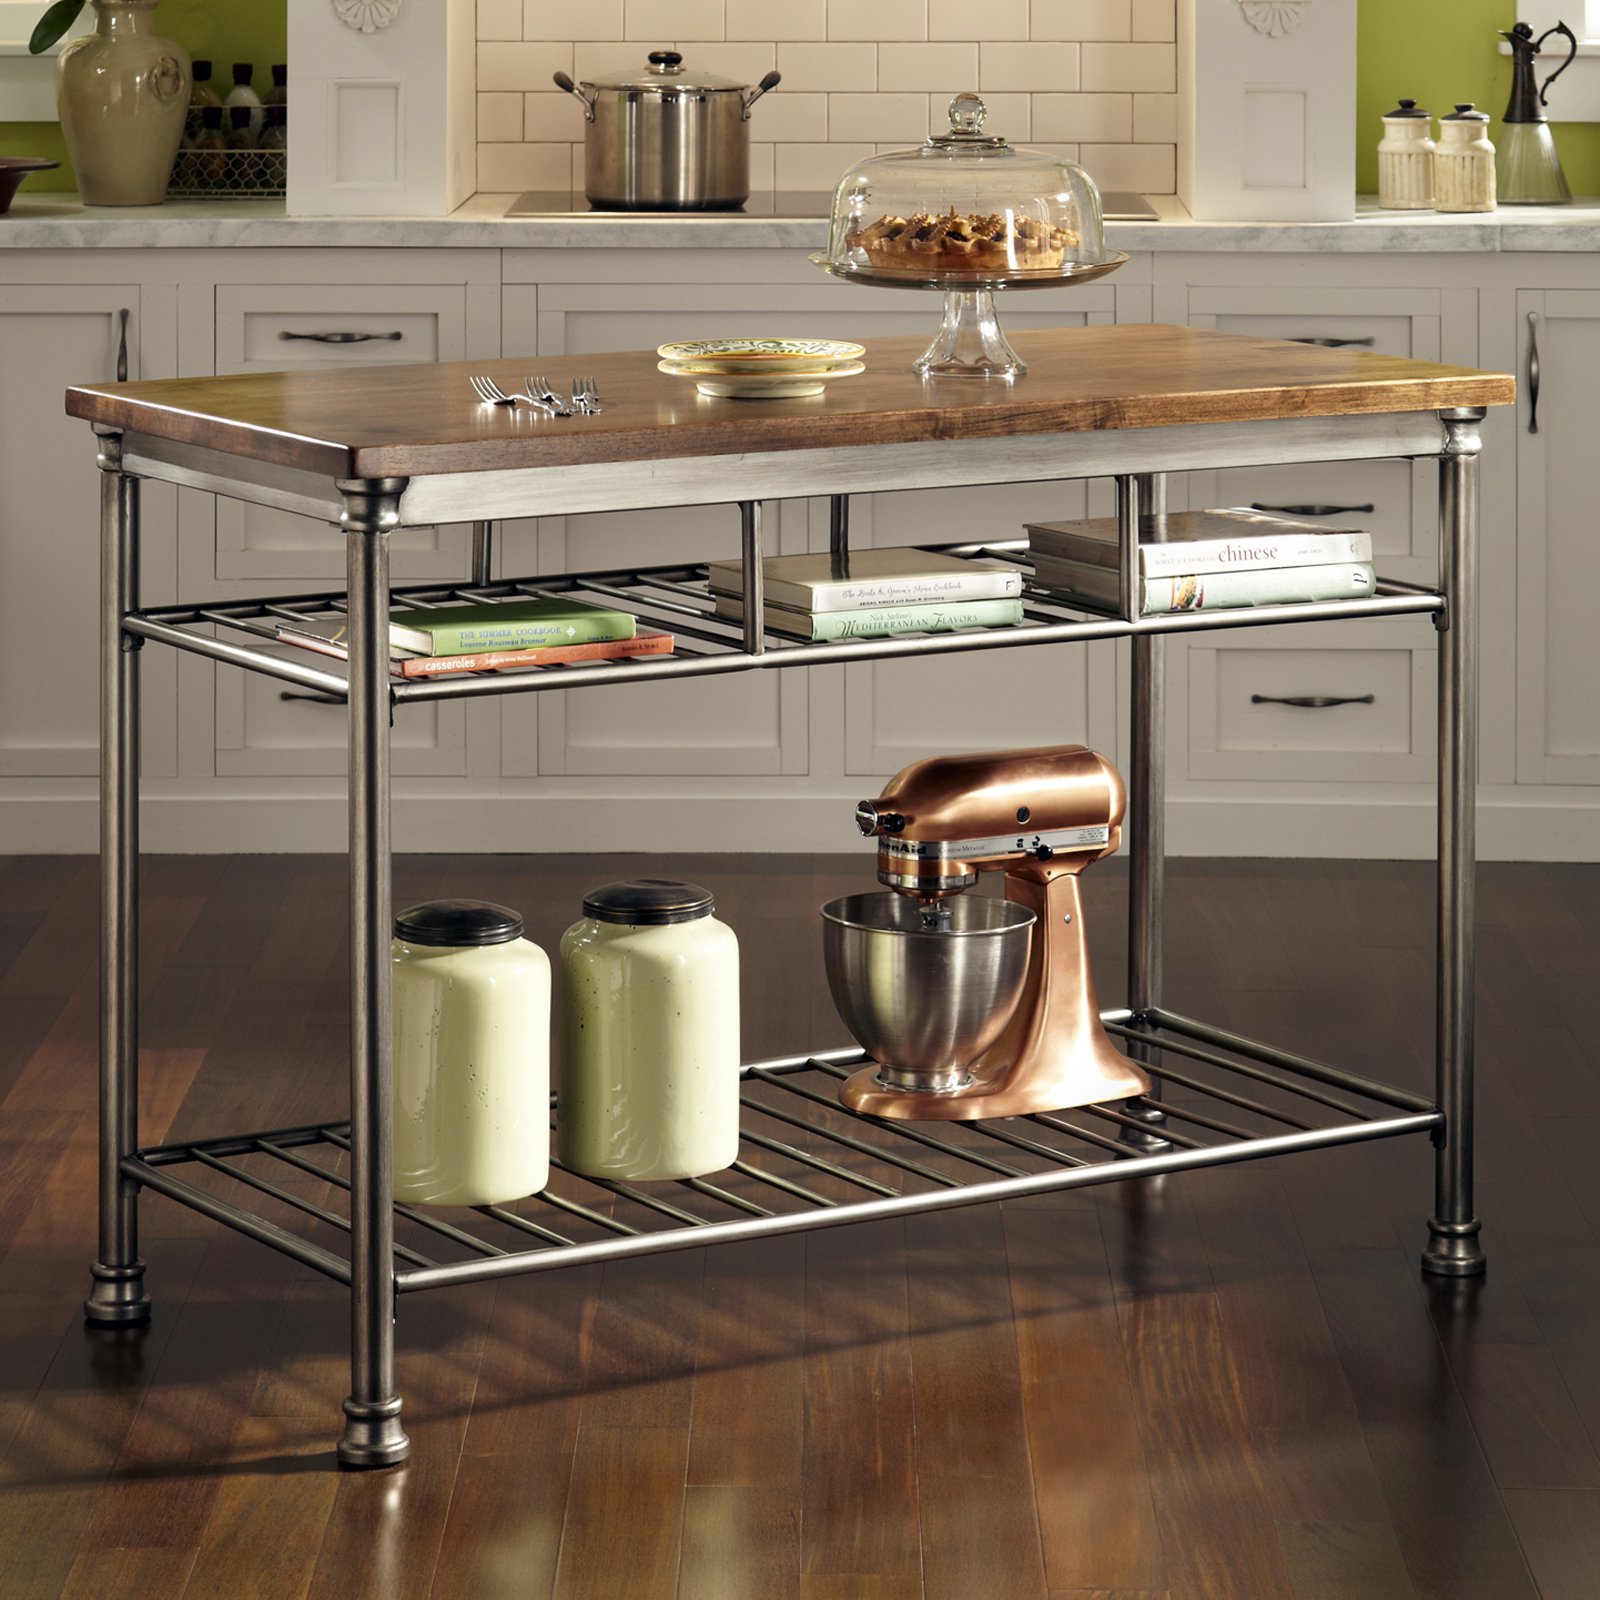
For another look with boundless industrial appeal, almost any metal rack can be turned into a kitchen island with the addition of a set of wheels (and perhaps a top surface if you’re re-purposing a small set of metal shelves). Often sold new as “kitchen carts”, these professional-looking items practically beg you to get cooking.
Pros: Metal racks are germ-resistant and super easy to clean. They’re also lightweight, moveable, and especially good for storing things you also want to have on display: a beautiful basket, a colorful set of plates, or your impressive KitchenAid.
Cons: Metal racks usually don’t have drawers and may be limited on storage space. Their aesthetic is industrial, which may be too cold or unappealing for some people.
Cost: Even brand-new metal racks are often cheap: this one at Home Depot runs $126 and could be turned into a beautiful island with the addition of a hardwood top, which – depending on how fancy you want to go – could run you from $250 to $750 or more.
- Antique Furniture Kitchen Island
Looking for something with a little more warmth? Antiques have a way of endowing a house with a cozy, nostalgic vibe. Almost any piece of antique furniture can be upcycled into an incredible kitchen island, with a little creativity and elbow grease. Good choices to work with include side and end tables, cabinets, and even dressers.
Pros: Repurposed antiques are surefire conversation starters and have excellent “curb appeal”; they can really stun on first sight. They’re great for displaying or storing the best of your dishes. Plus, if they’ve lasted several decades and are still in good condition, you can bet they’re sturdy enough to show off for years to come.
Cons: If you’re planning on using the island to prepare food, you may need to add a custom top – both for food safety and in order to avoid damage to your piece — which will make your frugal DIY project into something a bit more expensive.
Also, older pieces may be heavier and more difficult to clean or move around. Also, worth noting: if you have young kids, you may have to keep them out of the kitchen to avoid getting crayon on Grandma’s heirloom china hutch.
Cost: Antiques vary heavily from piece to piece, depending on quality, age, and the location of your antique store. (Places known for antique shopping are likely to have inflated prices, so check out local yard sales, estate sales, Craigslist, and the like.)
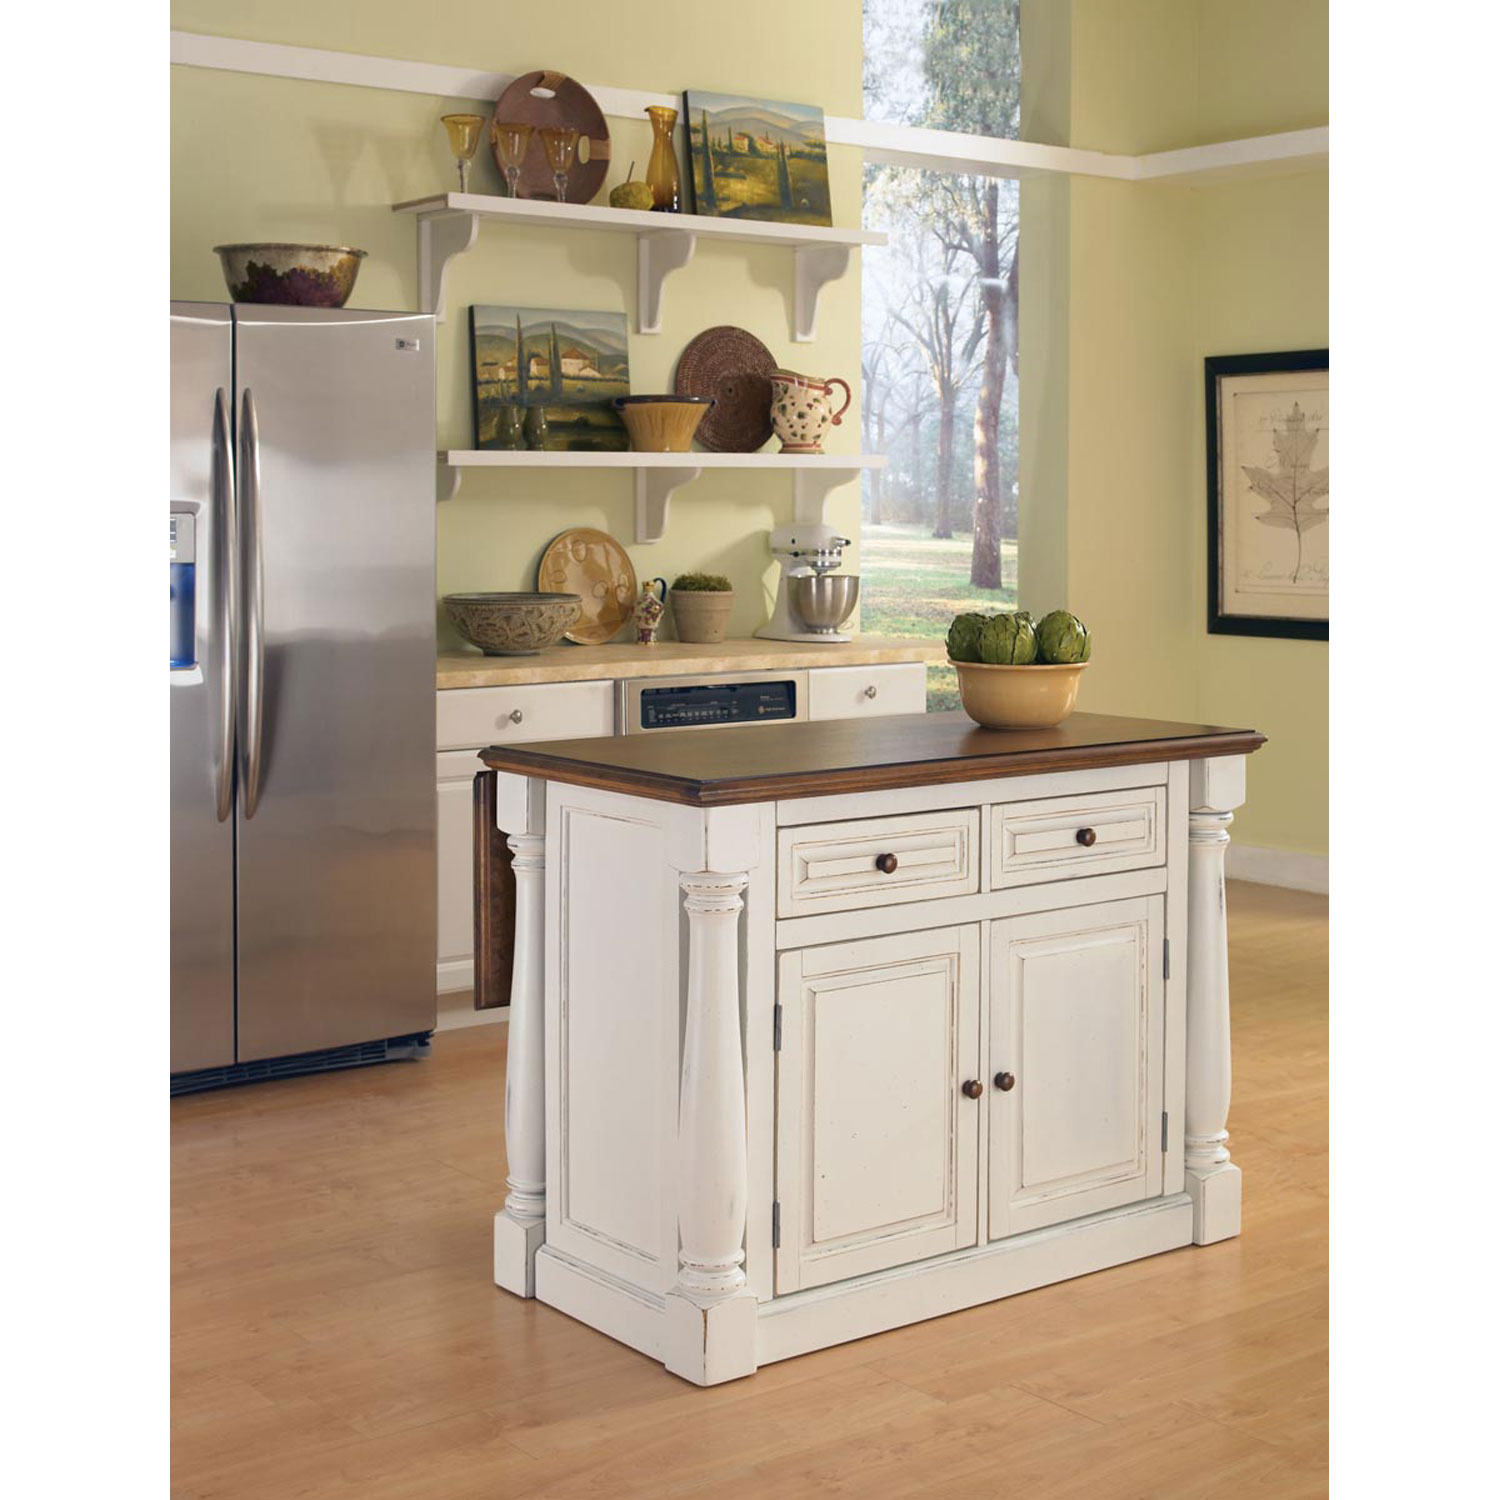
- Painted Cabinets Kitchen Island

One thing that many kitchens lack — even well-designed kitchens – is personality. What makes your kitchen any different from every other kitchen on the block? An island is a good piece to make a statement with – especially since, if it turns out that you don’t like the statement you’ve made, it’s easier to remove a turquoise island than a turquoise oven. But splashes of color are the right idea; they can easily say “unique” without saying “gaudy”.
Pros: Old cabinets, which are easy to paint and have plenty of storage by design, are just the right piece of furniture to upcycle into that unique statement island.
Cons: Some cabinets might be very large and heavy. And smaller cabinets – like old kitchen cabinets – might not have the amount of storage that makes their larger varieties so attractive. Plus, it’s less likely that you have a set of cabinets laying around than other potential upcycle-worthy pieces.
Cost: The primary feature here is the color, so unless you’ve got an already brightly colored cabinet ready to go, you should begin your estimate with the cost of high-quality oil-based paint – typically between $30 and $45 a gallon, plus some paintbrushes and painting tape ($15 to $35).
If you’re using an older piece, you may also need an orbital sander to smooth the surface.
It’s up to you if you want to install a custom top or hardware; while knobs and the like are cheap, custom countertops can run $85 to $175 per square foot, depending on the material you choose. And if you’re buying a cabinet to start from scratch, expect to spend at least a few hundred dollars.
- Round Kitchen Island
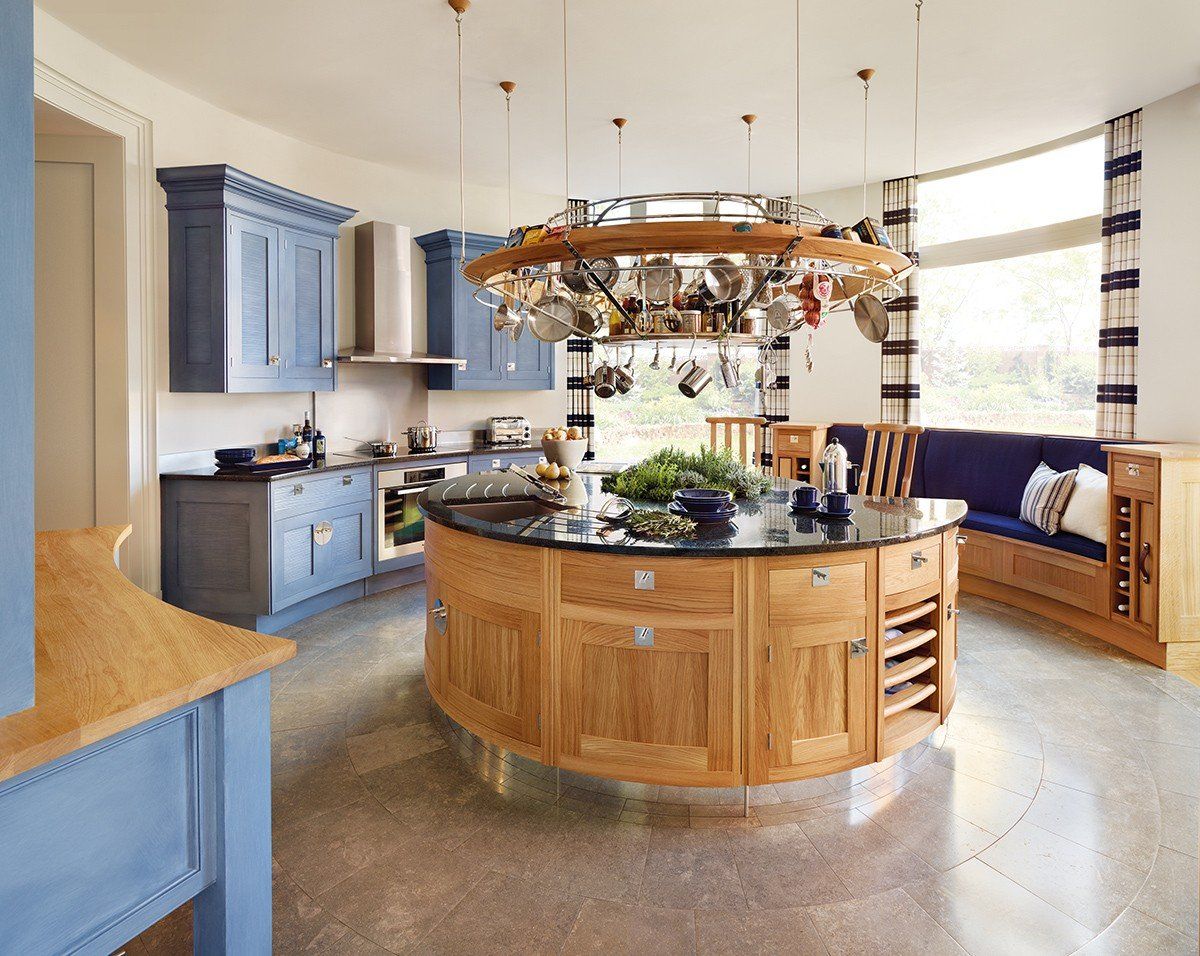
Another way to shake things up? Go round! Almost all kitchen islands are rectangular (or square, if they’re small). A round kitchen island, while not unheard of, is unusual enough to really draw the eye (like in the picture above).
Pros: With fewer corners in your kitchen, what you end up with is an informal look and a flowing, warm feel. Plus, round kitchen islands tend to be a bit more space-saving and fit into more kinds of kitchen layouts than their traditional cousins.
Cons: Unless you have a round end table to upcycle, you will probably have to buy this new – and it’s rare enough that you may have difficulty finding one! Also, the storage may not hold as many types of items as a typical rectangular island, since anything stored will have to fit around curves (and may have less surface area to rest on).
Cost: Prices can range considerably but tend to be on the more expensive end: from $300 for a small cart, all the way up to $3,650 or more for more elaborate looks.
- Kitchen Island with Foldout Table
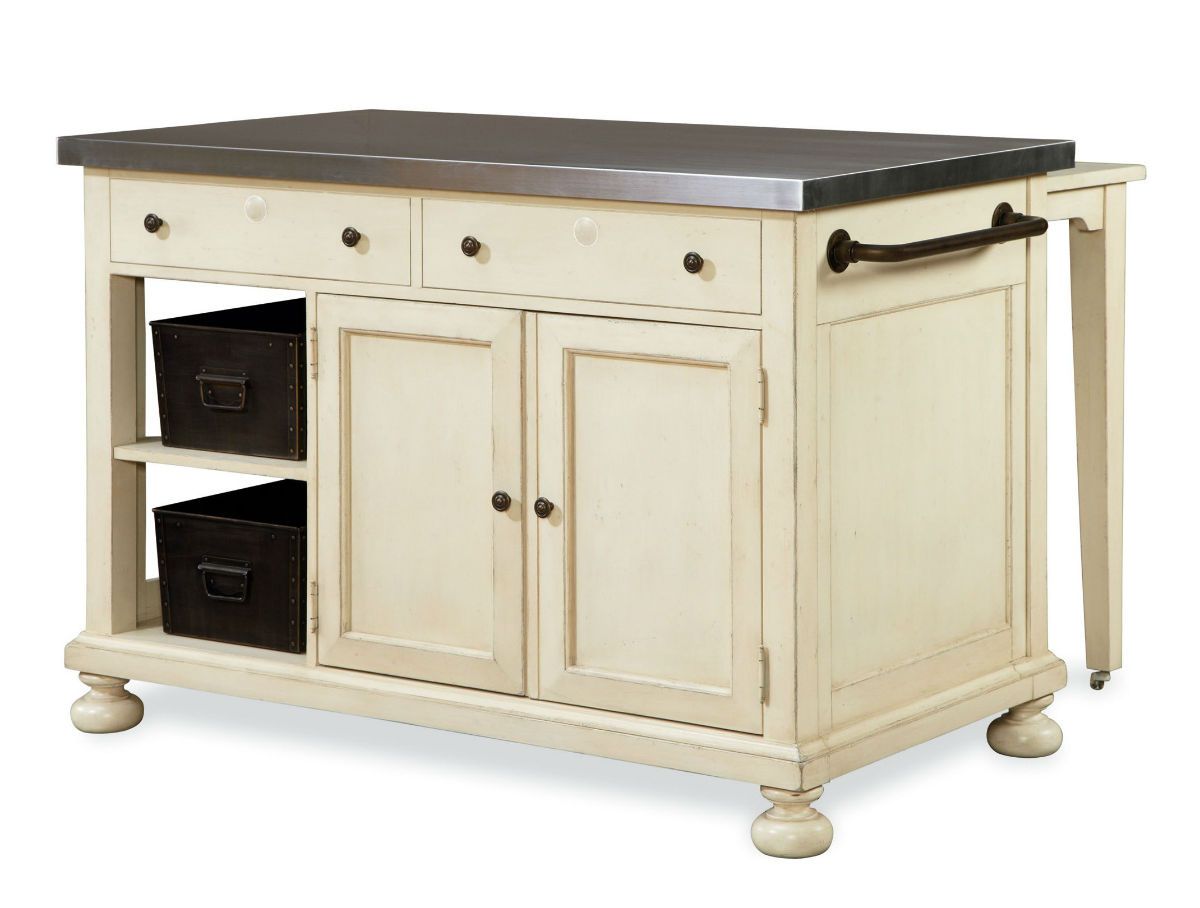
One thing people love to do with their kitchen islands is turn them into small seating areas or extra tables for days when you have lots of people over at the house (like Thanksgiving, for instance). But if your kitchen can’t accommodate a large island, a foldout tabletop (also known as a drop-leaf) may be just the solution you’re looking for.
Pros: Obviously, a drop-leaf island allows you to have more surface area when you need it and save space when you don’t! That flexibility is hard to find, and it’s especially good in smaller kitchens where space is at a premium.
And the leaves don’t need to be used only for turning the island into an extra seating area; they can also be used to provide more kitchen workspace.
Cons: The only real downside to a foldout island – unless you just hate the look of foldouts – is that the area underneath the dropped leaves is basically unusable while the top isn’t folded out, reducing the amount of storage and/or extra hardware you might have in a non-folding version.
Cost: Cheaper foldout islands run about $200, while the more expensive versions run $600 or more. (They tend to be less expensive than other new islands because they are, by design, smaller.)
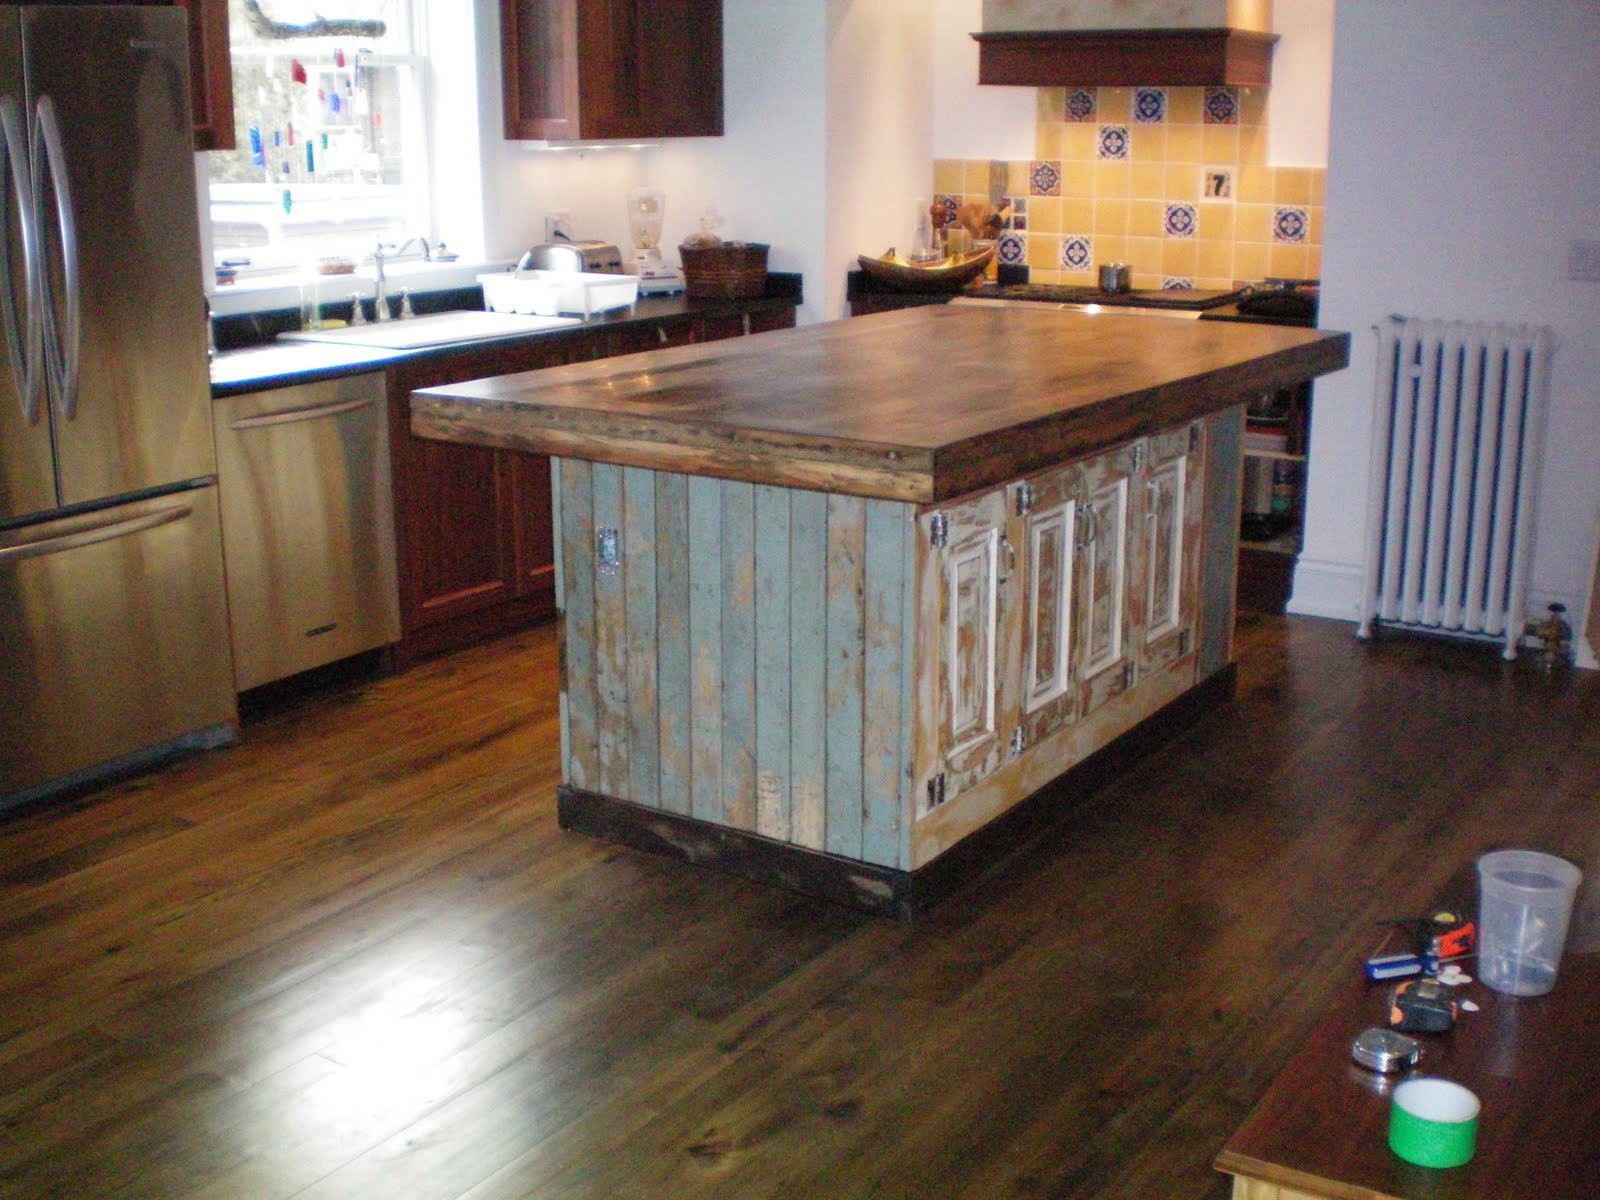
- Brick Kitchen Island
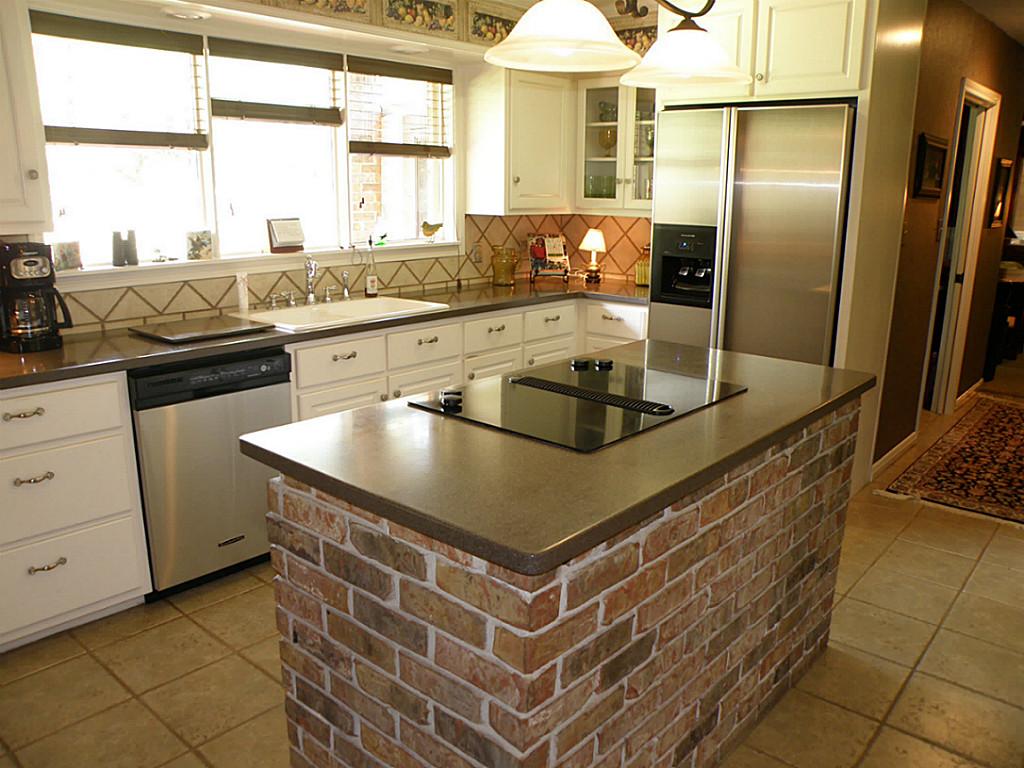
There’s no doubt about it – rustic is in. Rough wood beams, stone, natural fabrics, and (you guessed it) traditional outdoor building materials like brick are filling the houses of the design-conscious homeowners.
A typical brick kitchen island is actually a set of wood cabinets with a brick exterior – meaning you can still get that space for pots and pans you’ve been looking for.
Pros: Brick islands are unique and charming; their appeal reaches across typical aesthetic lines and enchants the older couple who like vintage everything, the millennials trying for an industrial look, and the 40-somethings going for a country-chic vibe. They will definitely add that “wow” factor that tends to lead to a higher ROI if you’re trying to sell.
Cons: If you have kids, the unforgiving brick wall in the middle of the kitchen could be a safety hazard.
Also, grout is notoriously hard to clean, although any dirt may simply blend into the overall look. Finally, unlike many other kitchen islands, a brick island will not be easy to remove or replace. Consider it a permanent fixture.
Cost: Well – just how rustic are you going for? Here’s a very simple DIY tutorial on making your own, which calls for outdoor paver bricks (sometimes as cheap as $2.50 a brick) and plywood (starting at about $50 per sheet, depending on the type of wood and size).
Otherwise, if you want something more professional looking, you’ll have to call in a custom masonry expert; expect to spend at least several thousand dollars.
- Kitchen Island with Reclaimed Wood
Reclaimed wood has been a big hit in design magazines for the last several years.
If you’re not familiar, reclaimed wood is wood that’s been taken from old structures – doors and walls from old factories, barns, and the like – and is being re-used. It’s prized because it is earth-friendly (since no new trees have to be cut down) and for its uniqueness: each piece of reclaimed wood has its own defects and weathering, telling the story of its former life.
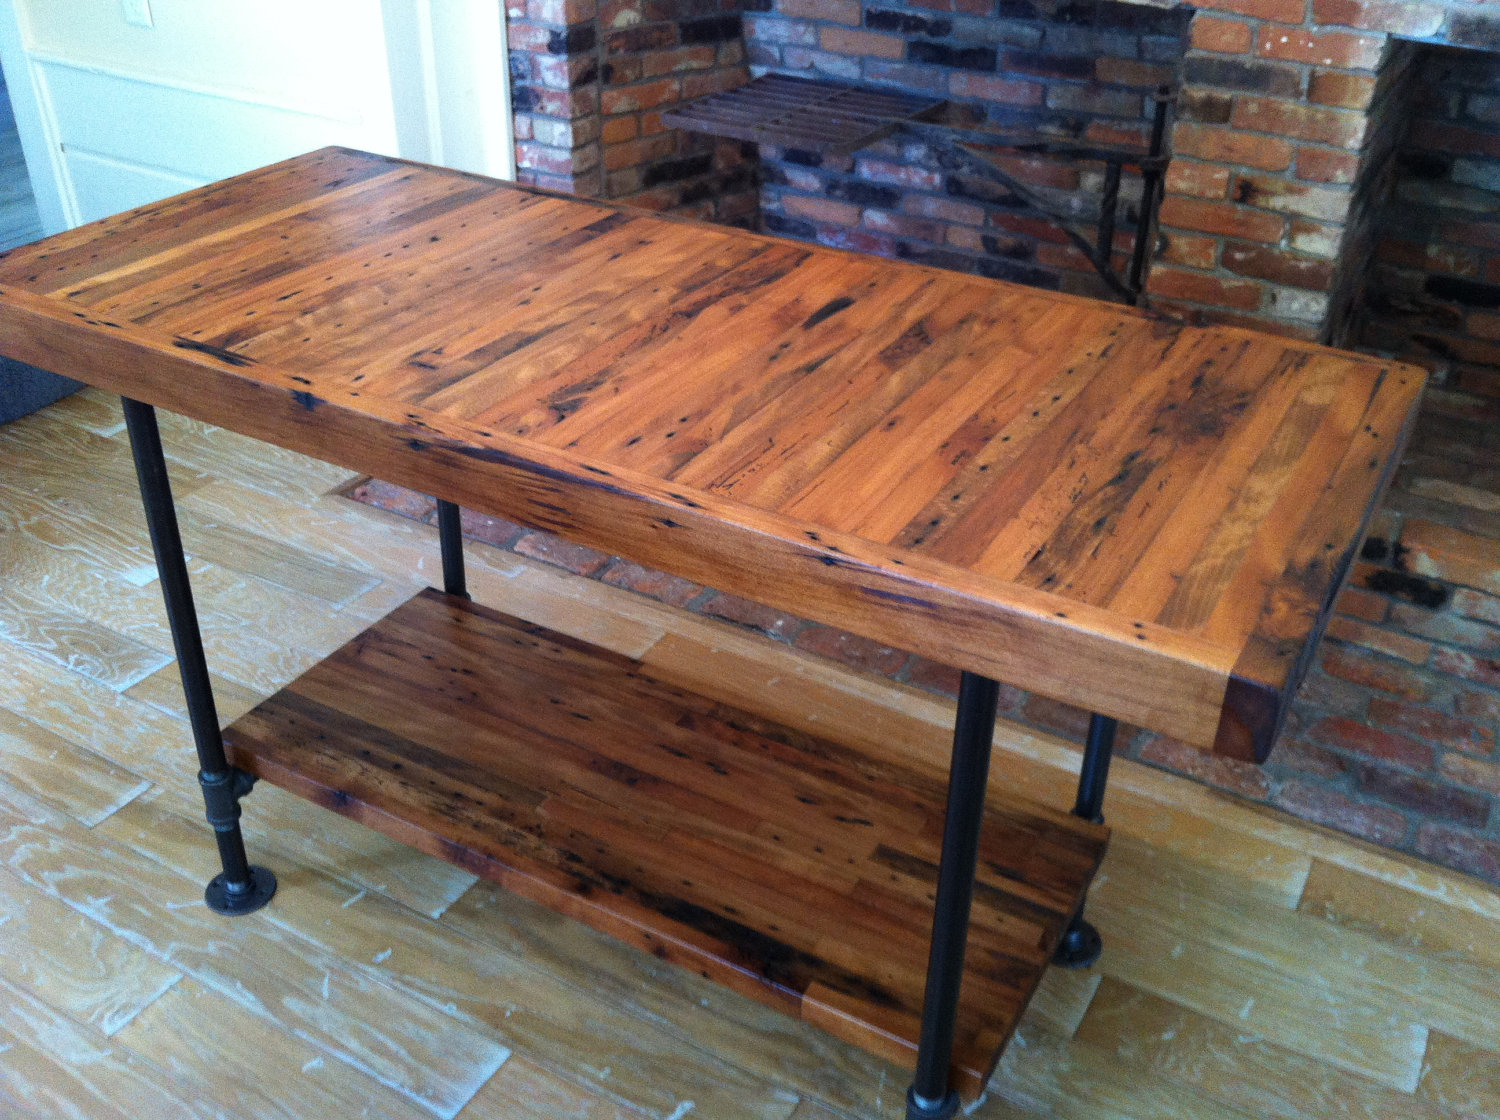
Pros: As mentioned above, a reclaimed wood island is both sustainable and visually stunning. They lend a cozy warmth to the room that is hard to get in almost any other material.
Cons: A kitchen island made of reclaimed wood will have to have a new top installed, which can get pricey – this is partially because you can’t be sure of the origin of the wood and therefore you don’t know what chemicals and treatments have seeped into it.
It’s also expensive in and of itself, since it requires a lot of effort and expertise to gather the wood and rework it into something suitable for a new life in your kitchen.
Cost: If you buy one pre-made (not custom, in other words – these are too difficult to DIY), you can expect to spend a pretty penny: this one from Crate & Barrel goes for $3,500, and that’s fairly typical, although some are a bit cheaper.
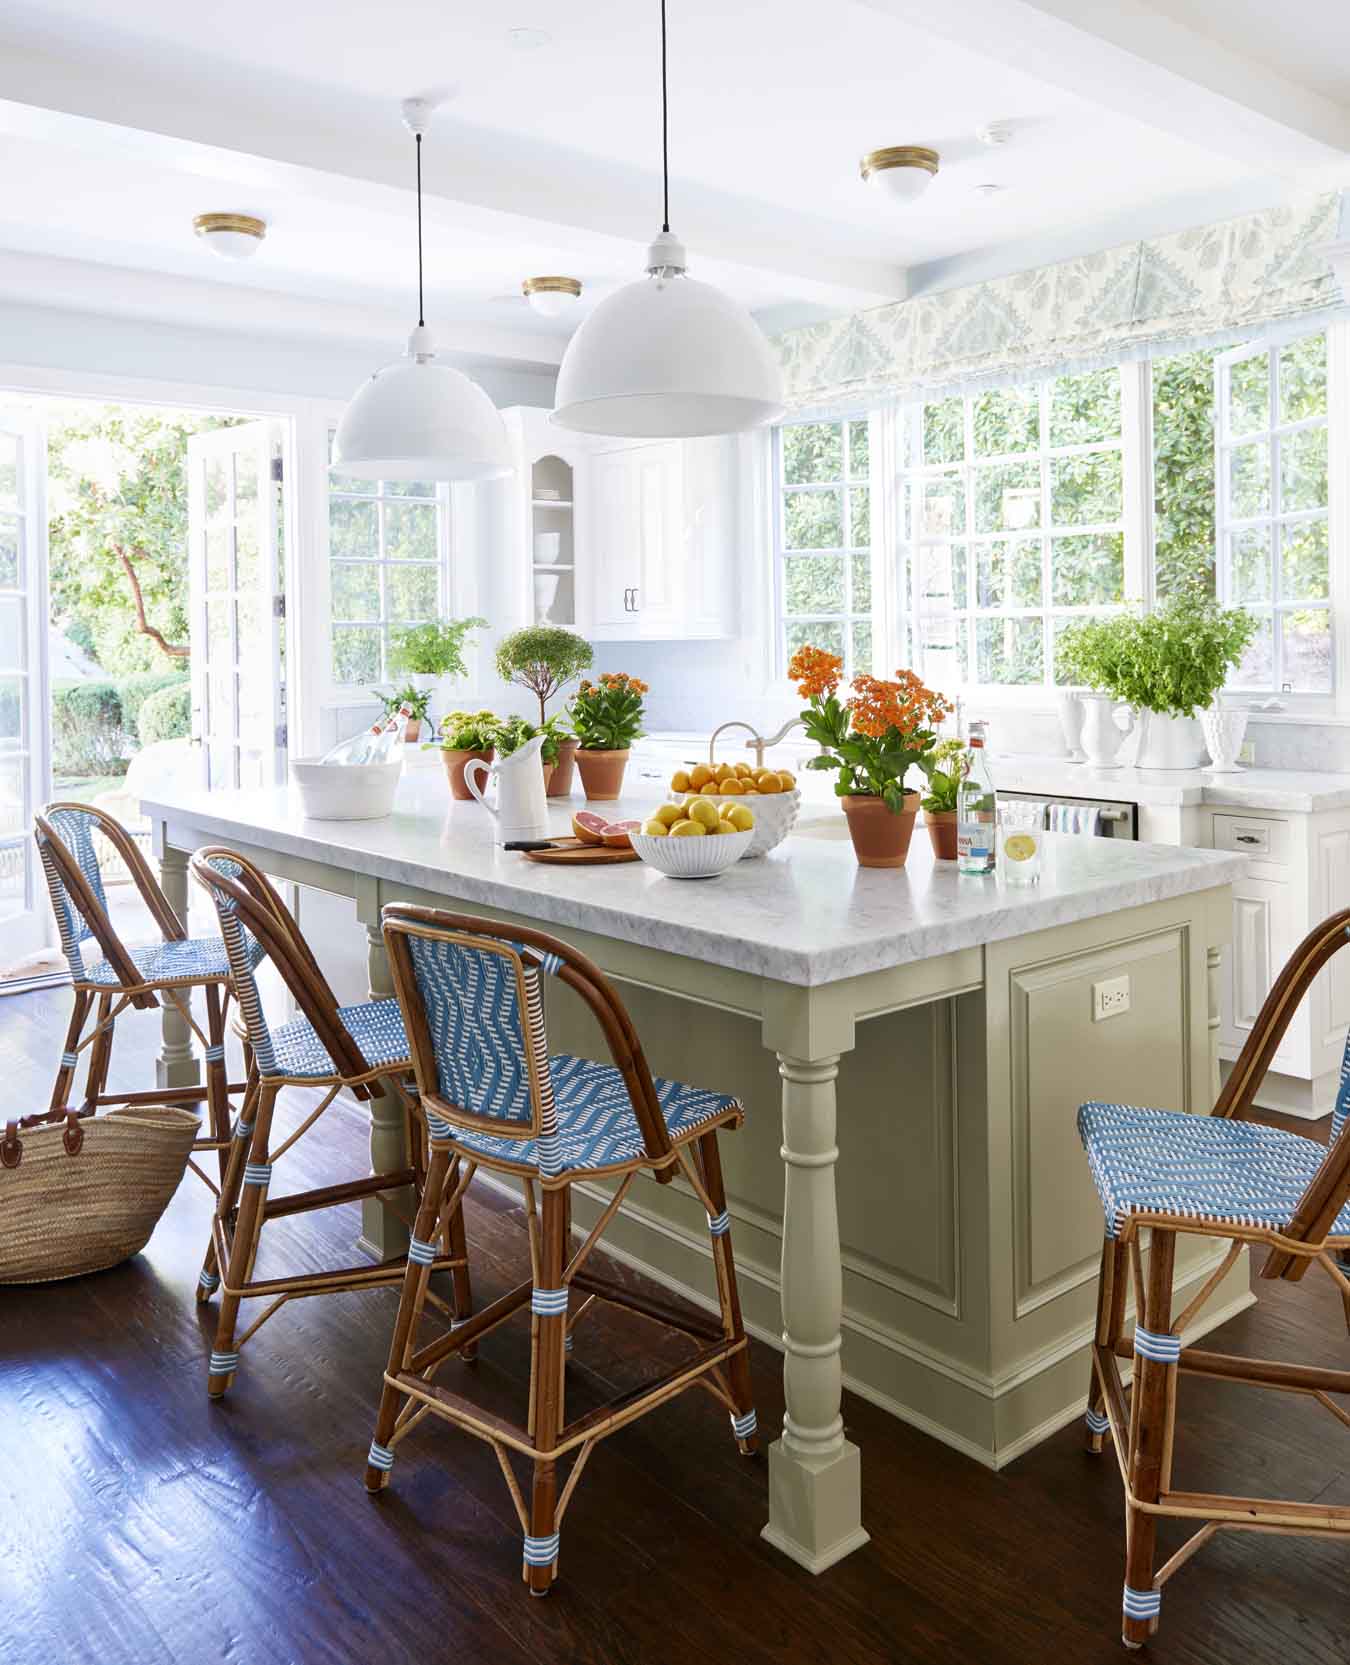
- Kitchen Island with Marble Countertop
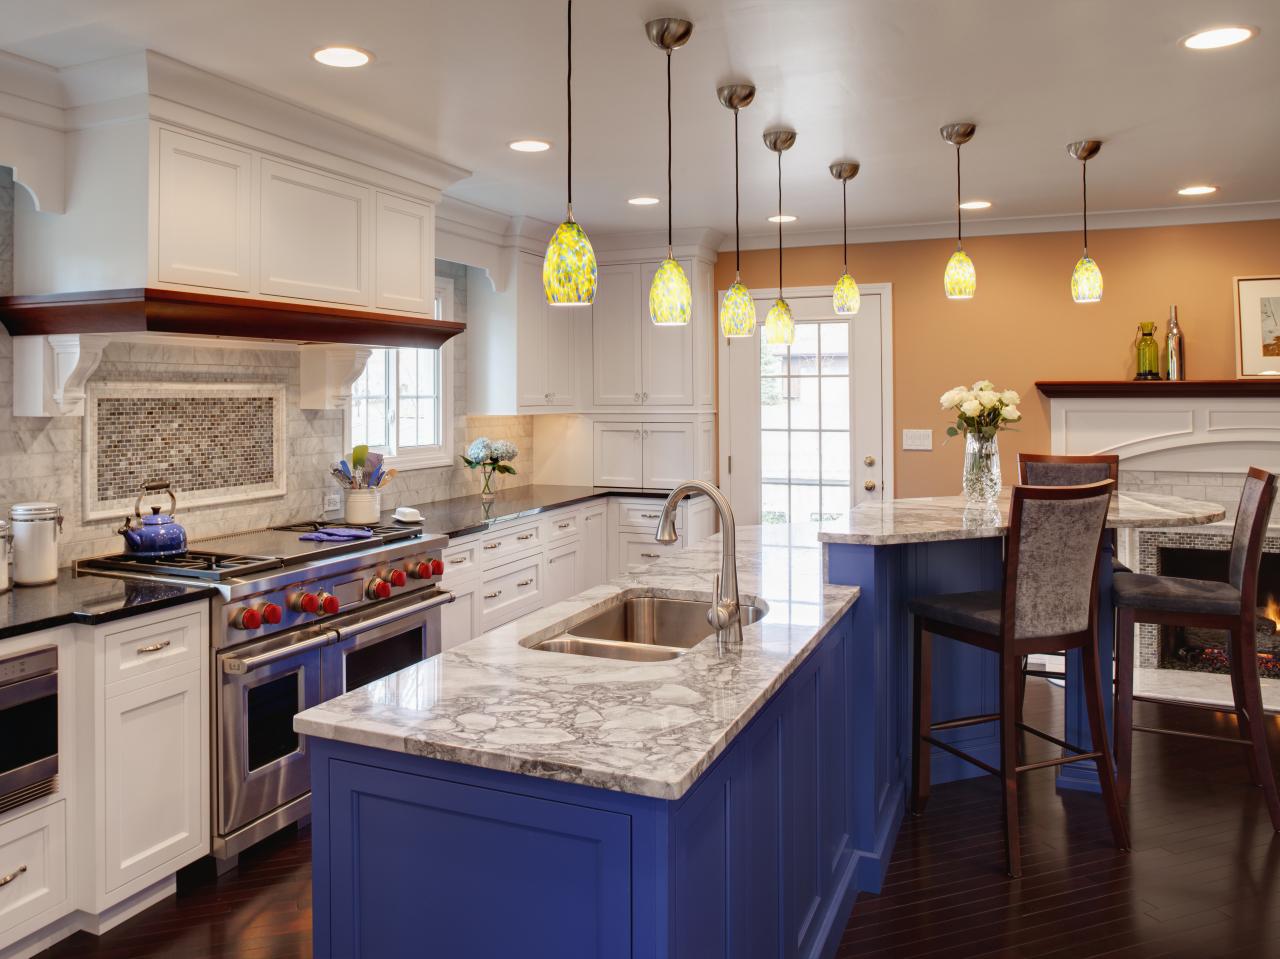
One of the cool things about kitchen islands in general is that their small size allows you to splurge on materials you wouldn’t be able to afford to do your whole kitchen in. Those luxurious marble countertops you’ve always salivated over are much more affordable in island-sized chunks.
Pros: Marble is pretty much the height of luxury, and many consider its natural beauty unparalleled. Plus, marble is heat-resistant – meaning you can afford to set that hot pot down on your island while you work.
Cons: Marble must be maintained: sealing is usually required once a year to keep it looking its best, and even then, the material is so porous and soft that it is prone to staining and scratching. It is therefore not the best material for an island that is destined to see a look of food prep work.
Cost: If you buy an island with only a marble veneer over the top, you could spend as little as $650. At the other end of the spectrum, a large island with a full marble top may run as much as $5,295.
- Recycled Desk Kitchen Island
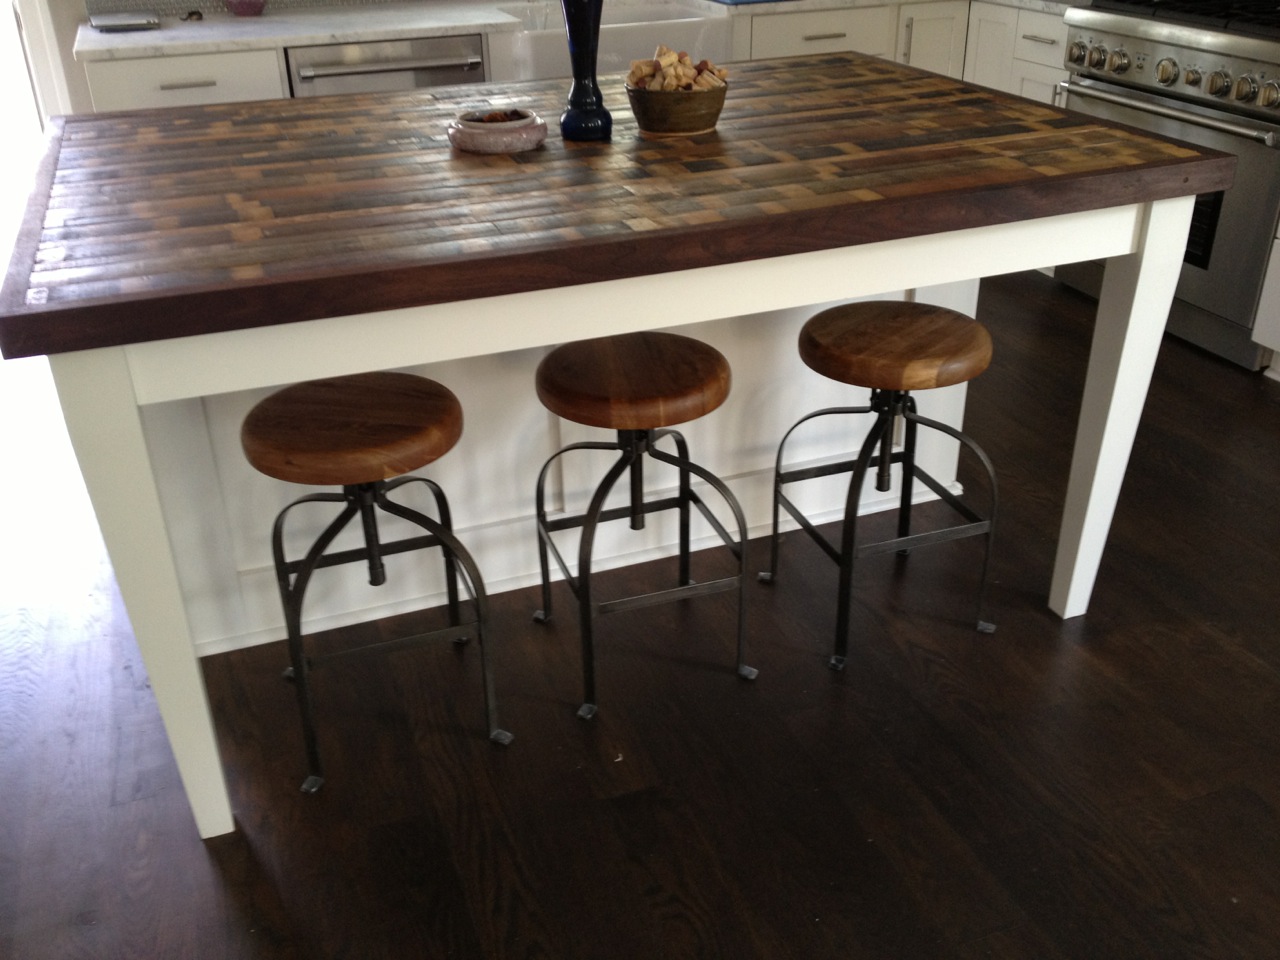
Though we’ve already talked a lot about upcycling various pieces of furniture into a new island, old desks make such an interesting conversion into an island that they deserved notice all on their own.
Pros: Desks are designed to be the right height to work on and to sit at, so you won’t break your back bending over the island while cutting vegetables, and your bar stools will fit perfectly.
The large space originally intended to house your legs while working makes a great storage space for taller kitchen goodies like blenders, KitchenAids, and double boilers. (It also makes a great place to install some hooks and hang long spoons or short pots.) Also, if your desk has a roll-out tray for a keyboard, bam! – instant extra workspace.
Cons: Desks are often too heavy and unwieldy to consider putting caster wheels on, so you do sacrifice some portability. You also may have to sand, stain, and seal the surface, depending on the condition of the top of the desk.
Cost: If you’ve got any extra furniture you’re not using, it’s likely to be a desk — and even if you don’t have one, they’re incredibly to easy find cheap at yard sales and on local buy-and-sell Facebook groups. You could spend anywhere from $0 to $250 buying one used. After that, your costs get even more specific to your situation: hardware? Paint? Sealant? It’s up to you.
For inspiration, here’s one DIY tutorial that includes a towel rack and corner molding.
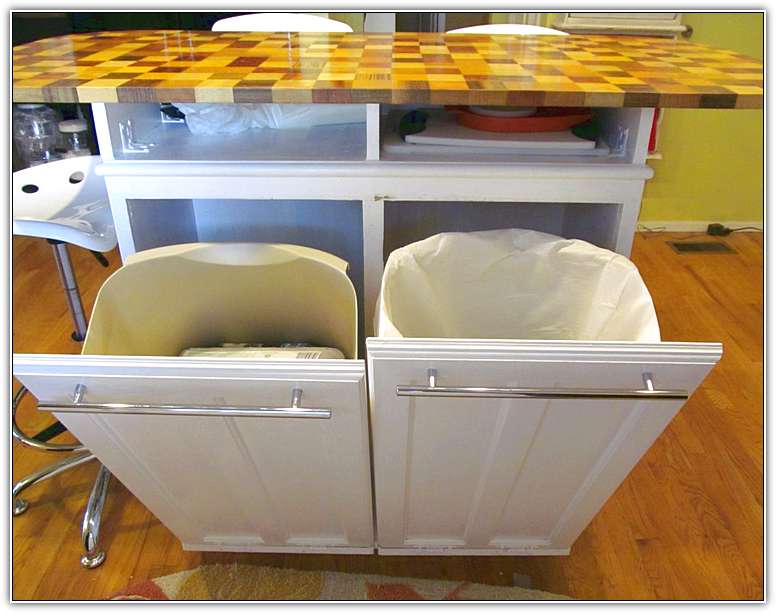
- Kitchen Island with Foldout Trash Can
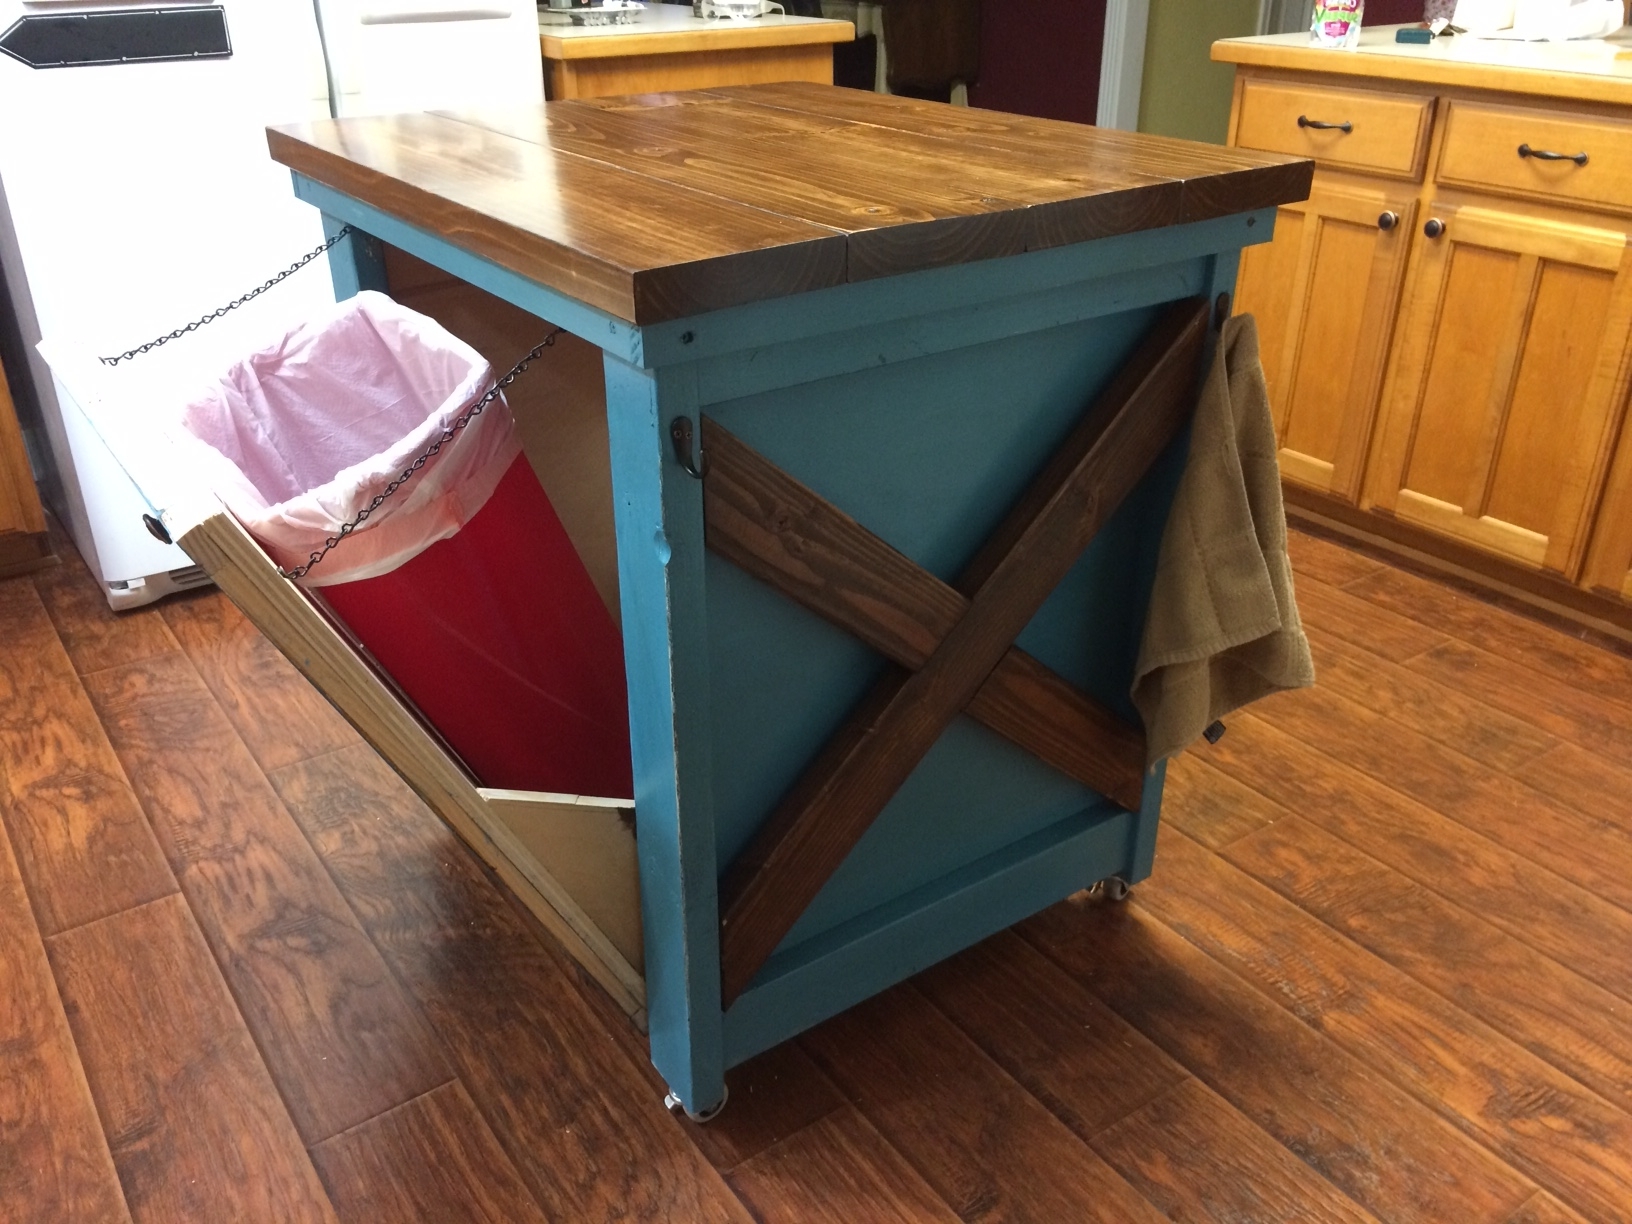
Of all the possible ways to add functionality to your kitchen island, having a foldout trash can has got to be among the most useful and practical – especially if you’re planning on using your island as an extra prep surface for cooking. You could even get extra crunchy-granola and install a small kitchen compost bin instead of a trash can.
Pros: No more hauling those vegetable scraps across the kitchen. Plus, if you’re the kind of person who doesn’t make a lot of waste, or you have a taller island, you might be able to get away with having your under-island trash can be your only trash can – meaning no unsightly garbage bin in the middle of the kitchen.
Cons: Naturally, any time you keep a trash can in a small, enclosed area, you may have to contend with odors building up, so you’ll want to be sure to keep the trash emptied regularly and the area clean.
Cost: Here’s a tutorial for building a small foldout cabinet like the one in the picture above, from scratch, for less than $200. New, however, islands with built-in trash cans tend to run between $300 and $750, depending on the size of the island.
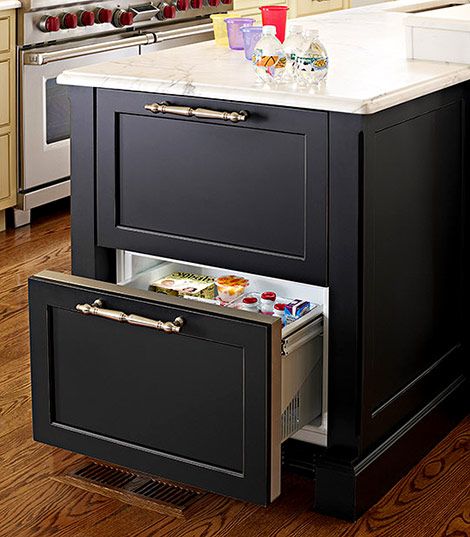
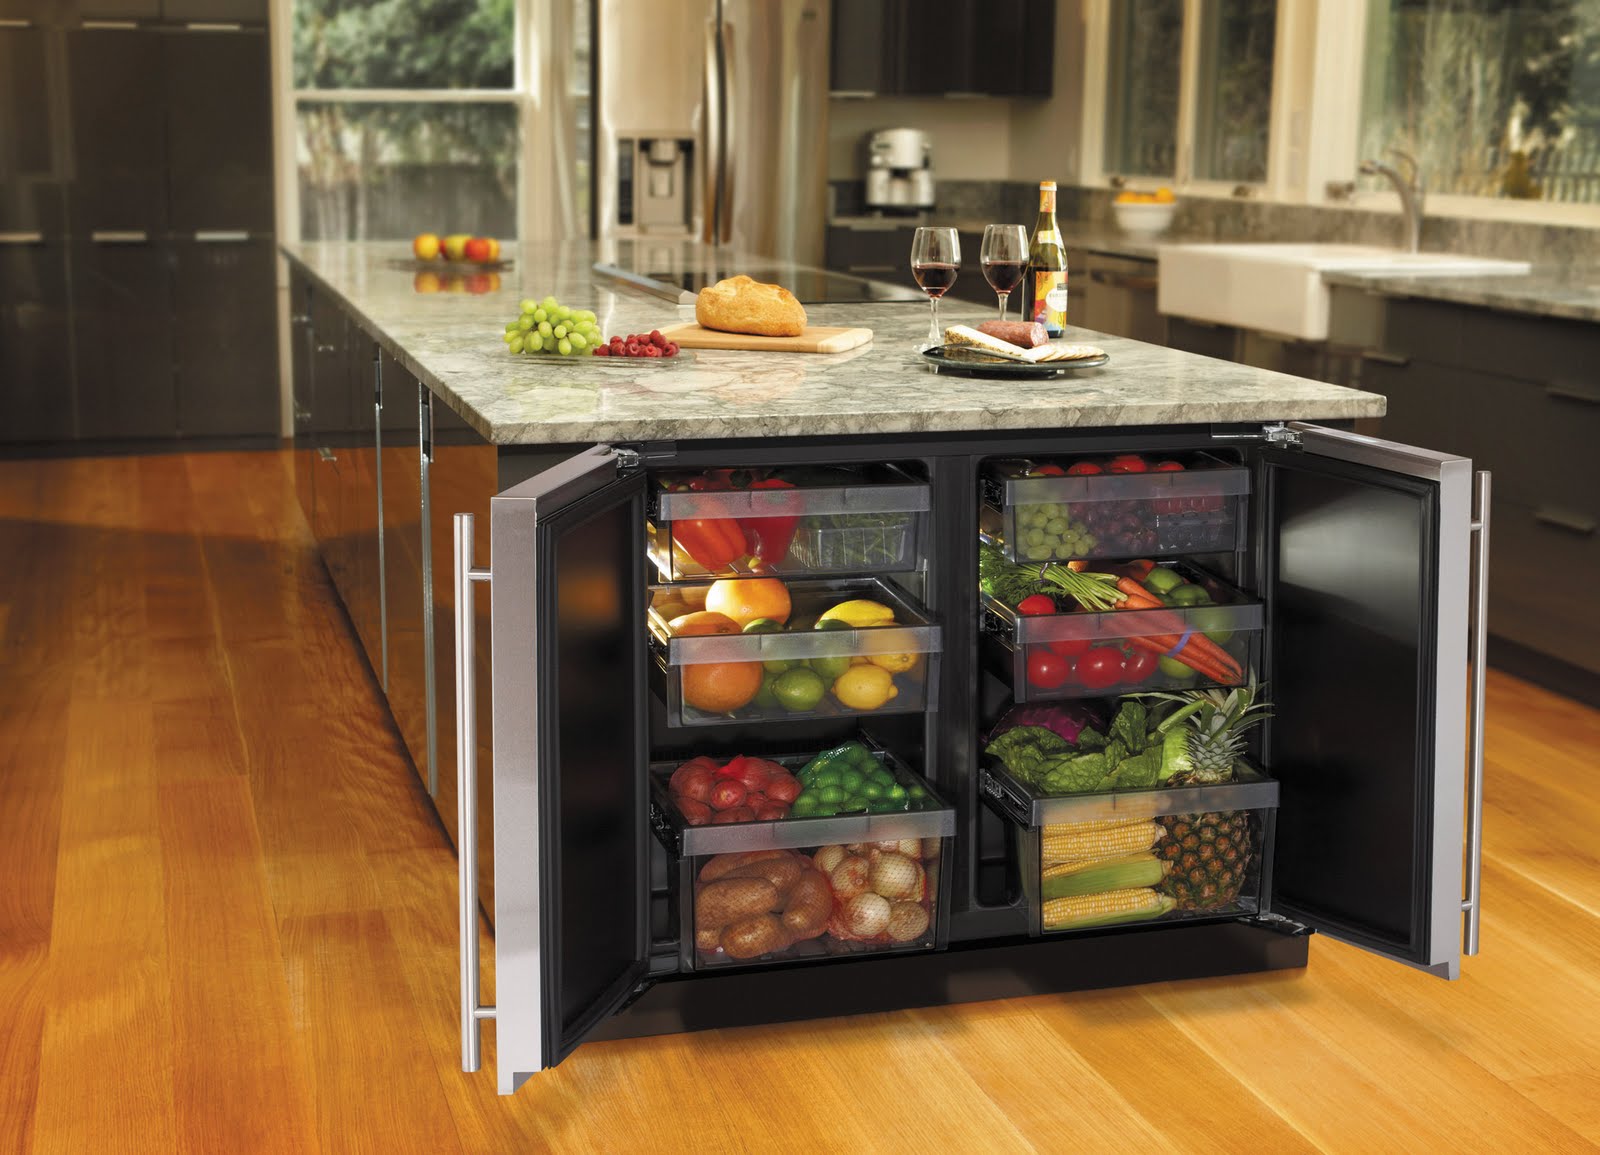
- Kitchen Island with Built-in Cold Storage
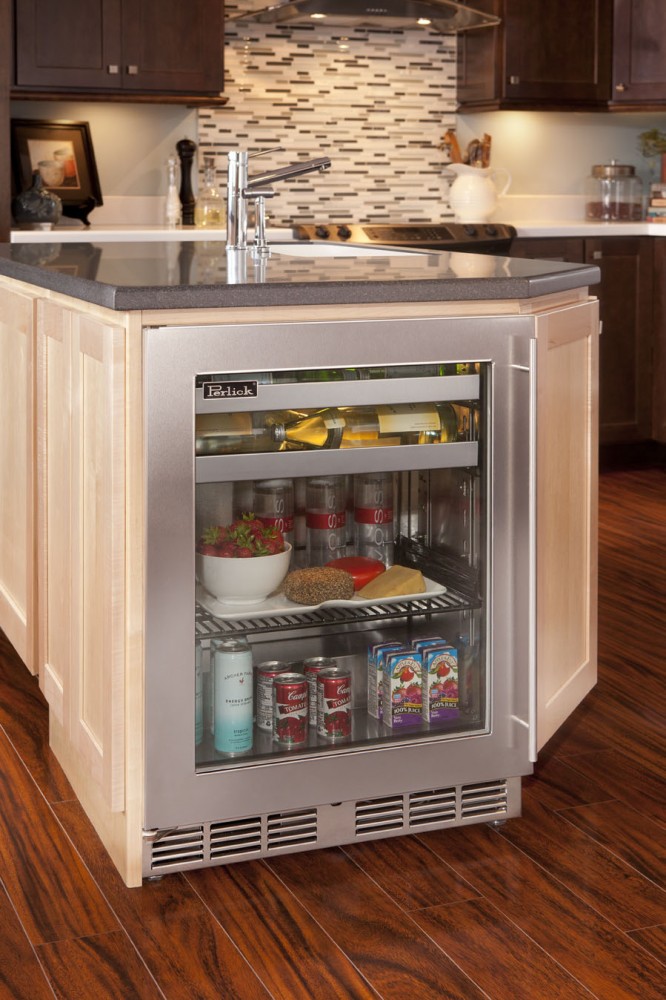
Under-counter refrigerators and beverage chillers are a hot trend in kitchens going for a sleek, contemporary look.
Any number of cooling solutions can be built right into your island, giving you extra cold storage – especially good if you like to entertain around a larger island and don’t want to have to keep getting up for snacks and drinks.
Pros: This is an especially “cool” idea for wine aficionados, who can turn the focal point of their kitchen into a wine cooler with independent temperature control, instead of keeping the wine in a too-cold refrigerator or a too-warm room.
Cons: This is not the best idea for people who have kids, as you can pretty much guarantee that small children will very much enjoy opening and closing the door repeatedly and wasting energy, if not dragging out the wine, beer, or whatever else you were storing.
Cost: When bought new, these chic additions can cost a pretty penny: expect to spend anywhere between $2,500 and $4,500. However, the cost can be cut down some if you DIY – buy a standalone wine chiller for about $750 and install it in your island yourself with a little elbow grease.
- Kitchen Island with Under-counter Microwave
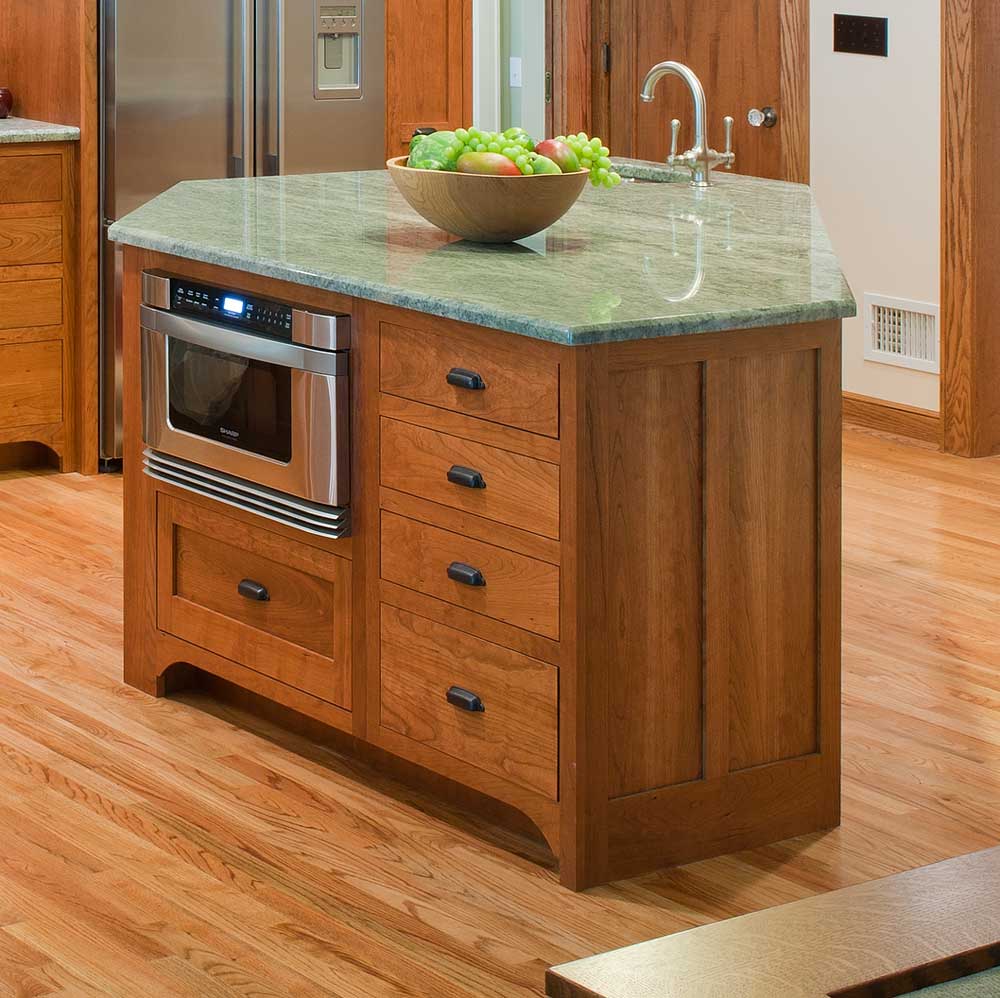
Dissatisfied with the traditional placements for a kitchen microwave? Don’t want to waste your precious counter space? Hate the over-the-range approach, or can’t install one? A kitchen island is a great, non-traditional place to help keep your microwave out of the way but still convenient.
Pros: Saving kitchen space and keeping uglier appliances out of sight are the two obvious pros, but they’re pretty big ones. This could also be an excellent choice as an accommodation for someone in a wheelchair.
Cons: Like the undercounter fridge, this is not the best choice for people with children, who may find that any number of household objects have made their way unexpectedly into the microwave. It also requires that you have a power source near your island, which may be difficult if you have your island in the center of an open area. And some people may not like bending over to open the microwave.
Cost: Costs vary widely depending on whether you need to buy a new island to accommodate your microwave, or simply install a new drawer. Microwaves built for use in microwave drawers tend to run between $1,500 and $3,000.
- Kitchen Island with Second Sink (or Stove!)
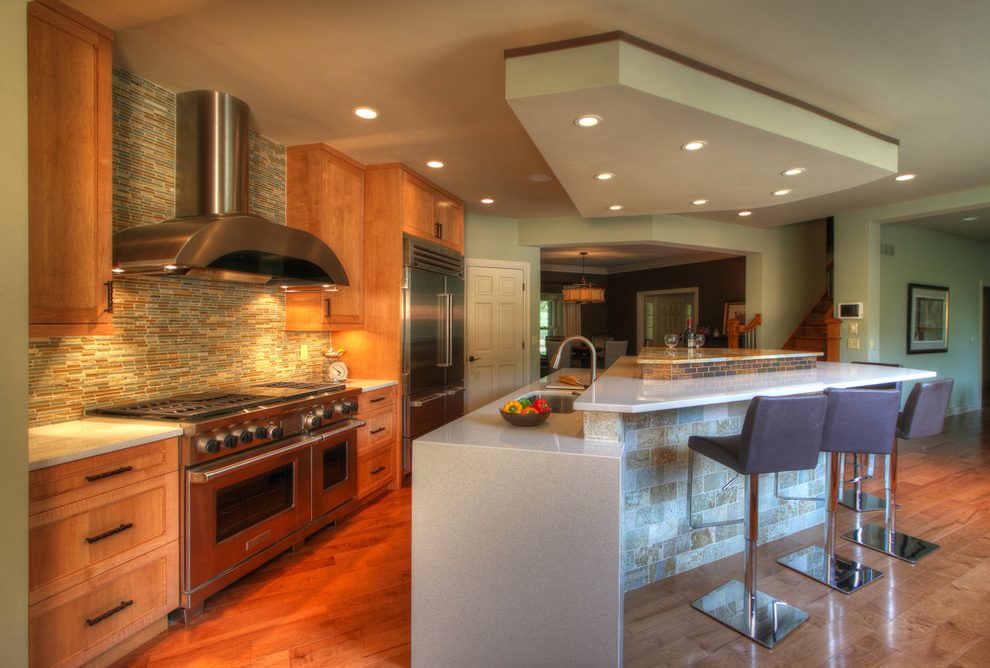
If an under-counter microwave isn’t dreaming big enough for you – why not a whole built-in stove? Or a second sink – who couldn’t use one of those? Functional is in, so let your imagination go wild.
Pros: A second sink means one person can wash dishes while another washes potatoes – much more can get done if you’re cooking for a crowd and your sous chef has a space of their own to work. That’s all true for a second stove as well. Or, if you need to defrost something or sit an ice bucket down, it’s nice to not take up your main sink.
Plus, the look of extra appliances or metal sinks is fabulous and somehow very cozy, especially against a nice soapstone countertop.
Cons: A kitchen island with an extra sink is going to require significant plumbing, and an island with a stove may require additional electrical work. Either way, these will be expensive – and permanent – fixtures.
Cost: It’s not unreasonable to expect to spend between $4000 and $6000 for a custom island with amenities like these.
- Kitchen Islands with Hidden Spice Racks
Of all the added functionality you can upgrade your island with, a hidden spice rack has got to be the coolest – especially if you love to cook.
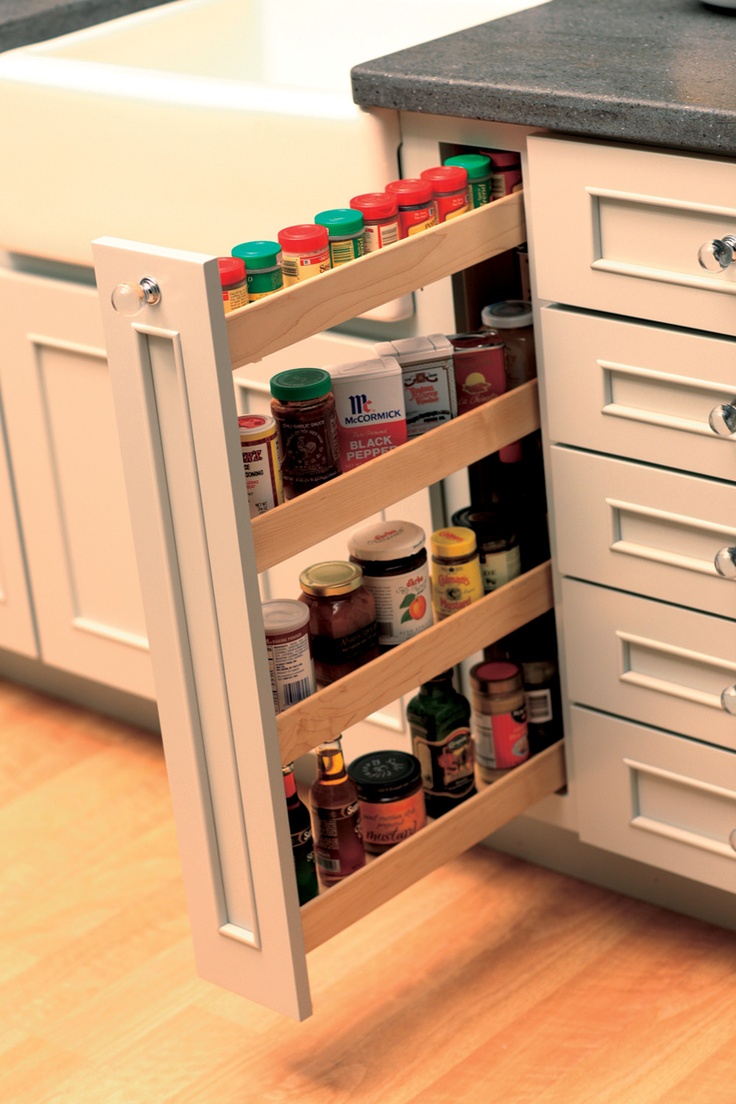
Pros: Figuring out how to keep a bunch of different spices organized is the sort of conundrum that generate thousands of idea boards on Pinterest. But you don’t always want to fuss with unreliable magnets or fancy jars.
An island spice rack does the job of organizing your spices for you and keeps the spices both easy-to-reach and out-of-sight. You could even get super geeky and build this pop-up spice rack yourself.
Cons: Very few. You may not want to bend down to reach the lowest rack, or you may find it difficult to install a spice rack in your current island.
Cost: You can buy a roll-out shelf for your hidden spice rack for about $130. Other spice rack solutions may cost varying amounts.
- Kitchen Island with Chalkboard
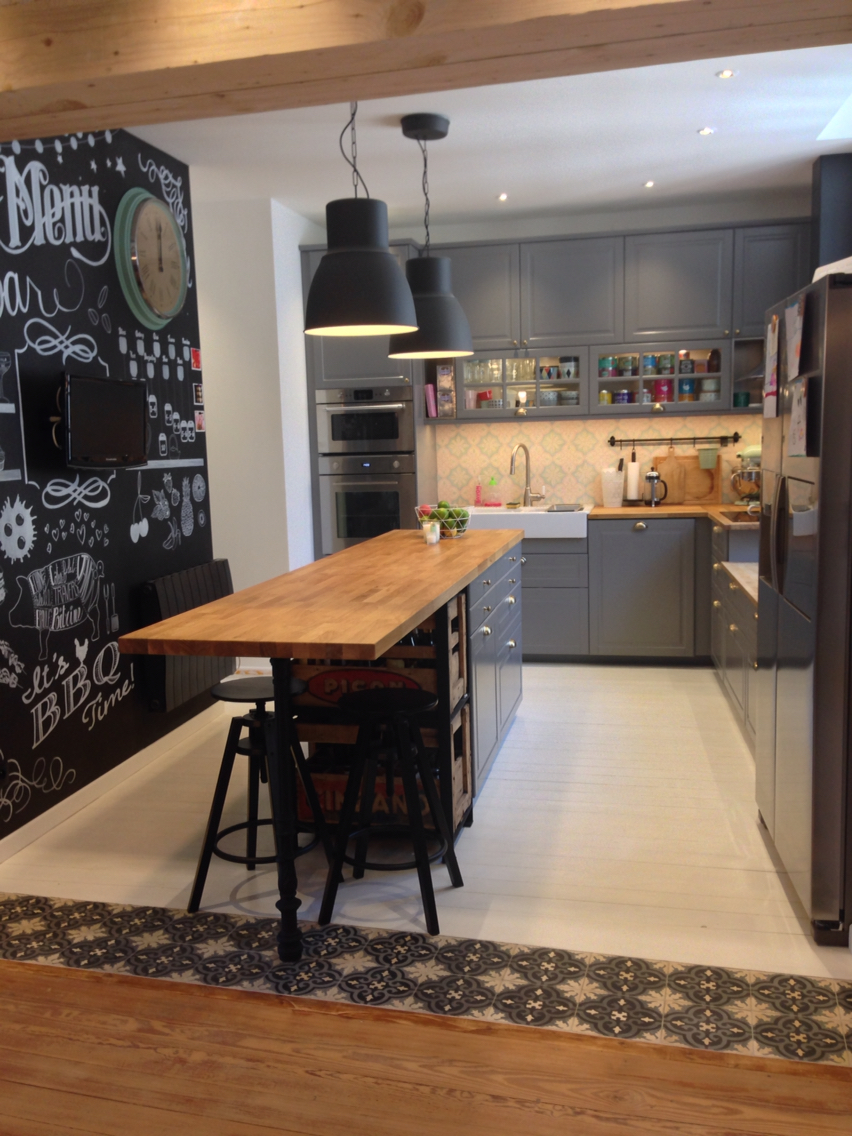
An island chalkboard is not a needful thing, but it is cozy, and farmhouse inspired – two things designers love right now.
Pros: Finally, a family-friendly addition to the island! Your kids – and probably your whole family – will love drawing and leaving messages on the island. You could use it to advertise the menu at a dinner you’re hosting.
You could even write a new recipe on it and just glance at it while you’re cooking, instead of trying to use your cookbook or smartphone while simultaneously keeping it away from the potential mess.
Cons: Two words: chalk dust!
Cost: Chalkboard paint is cheap – around $15 — making this one of the cheapest upgrades you could add to an island, and probably the best bang for your buck in terms of ROI.
- Kitchen Island with LED Lighting
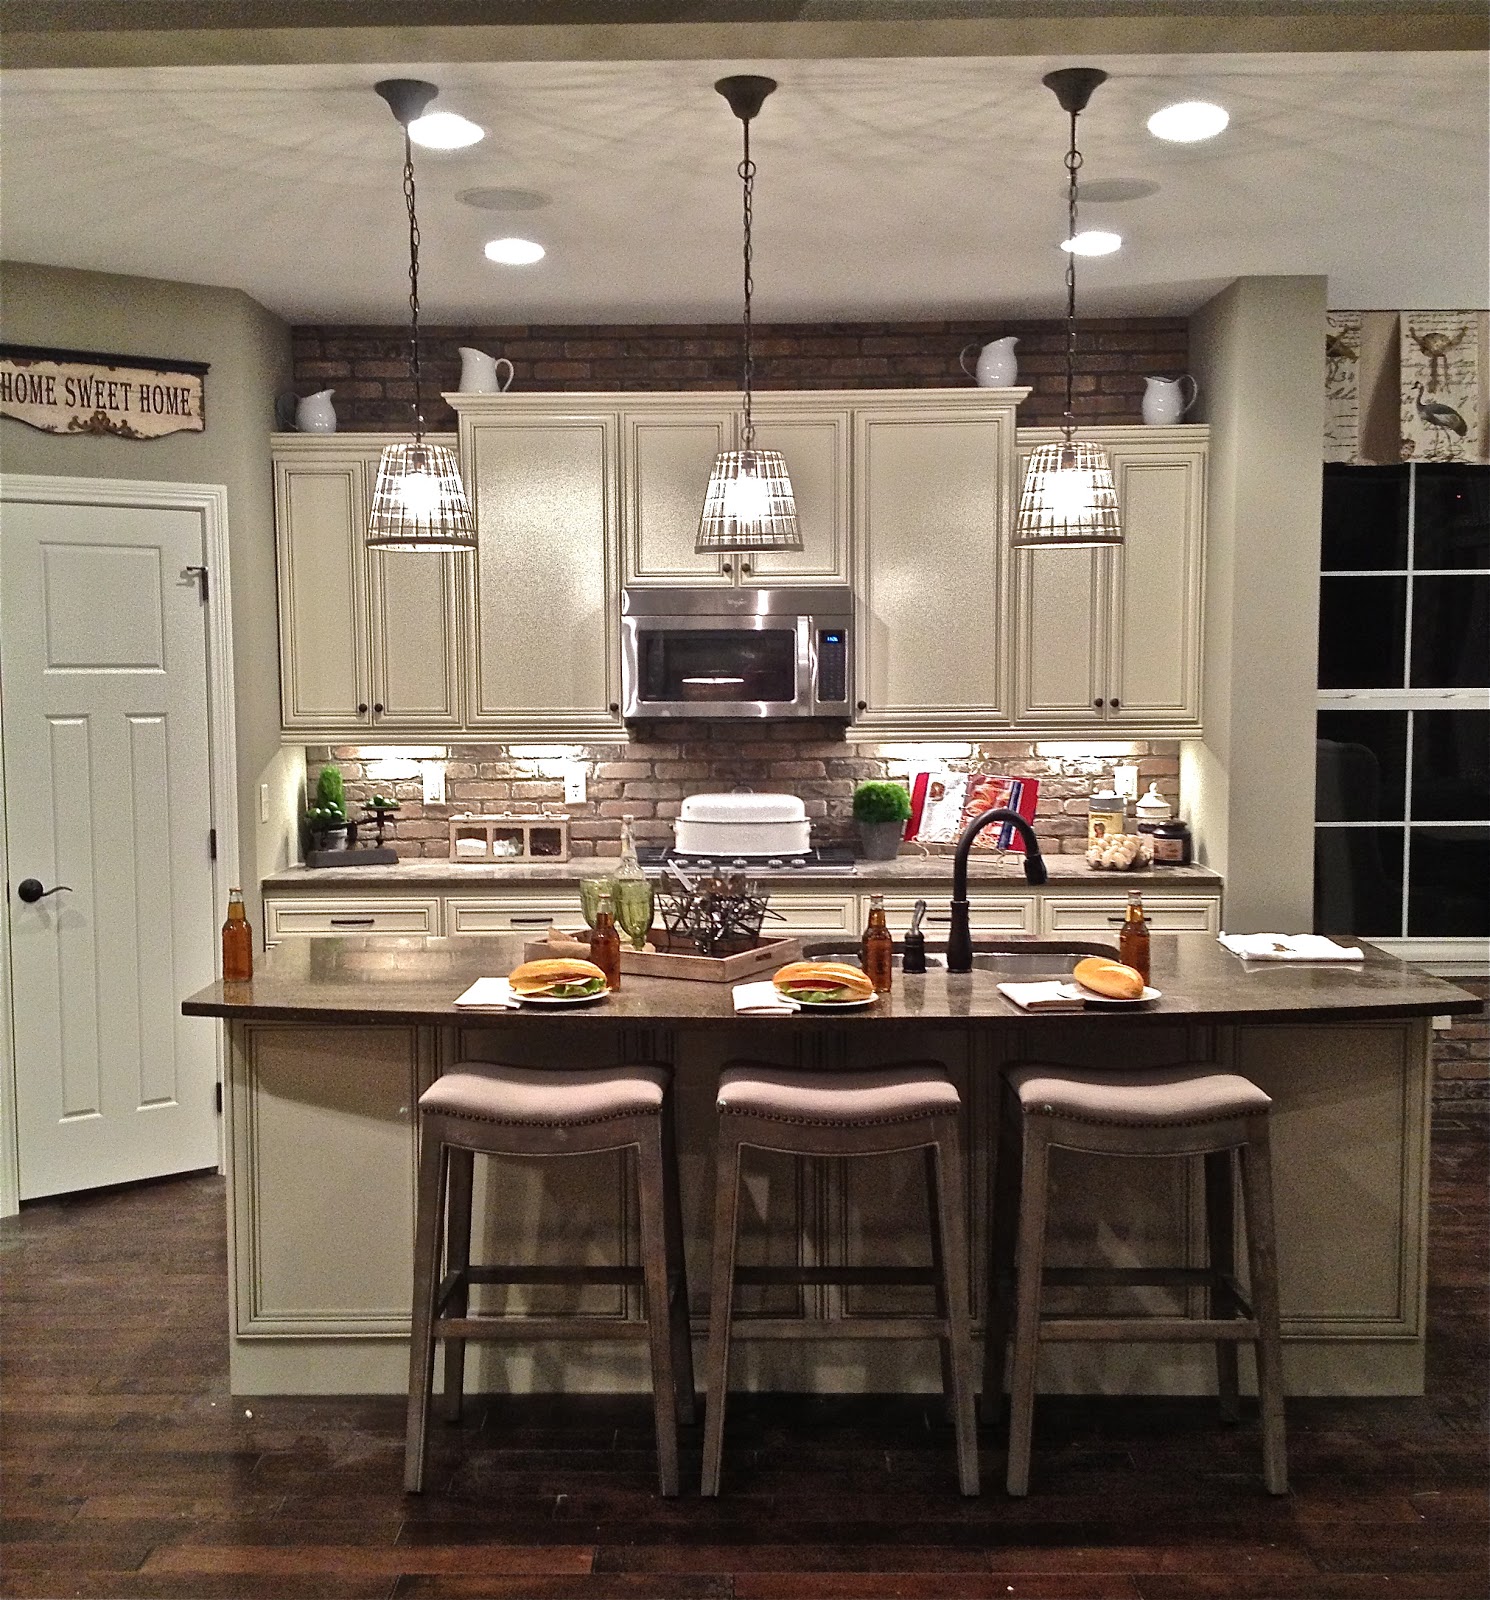
LED under-cabinet lighting can create a soft, warm, layered look the lighting in the kitchen, and provide an especially ambient atmosphere at night, when you’re looking for that midnight snack.
Pros: It’s all about aesthetics – and functionality. The extra light may help you see what you’ve stored in the back of dark cabinets, which is handy when they’re especially deep. Even cooler, LED lighting can be programmable and/or motion sensitive, making sure not a bit of energy is wasted.
Cons:This can be a difficult and/or expensive upgrade. If you’ve got the skills or the money, though, this can really add value to your kitchen. According to Forbes, this kind of lighting is increasingly becoming the norm in home design.
Cost: Depends on how handy you are. Here’s a tutorial to DIY the kind of accent lighting you see in the above picture.
Sometimes it’s a simple matter of an LED strip and a power supply. Otherwise, you may have to have a carpenter and/or an electrician out, which could get pricey, at about $350 per 12” fixture.
Love this website! I have a 50’s kitchen and so much has happened to avoid this renovation; need help and I’m ready now! Thanks, Suzie.